 |
ARTICLES |
First
Flights In My Rotorway |
|
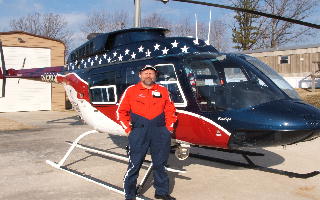
Summer is here and hopefully most of us are once again enjoying the exhilaration of piloting our ships around the patch. I was certainly glad to see the cold weather in the rear view mirror so that the doors could come off of the various helicopters that I have been privileged to fly. There is nothing quite like flying these little machines but there are several cautions that we as PIC's must always keep in mind when we fly with the doors removed. I learned this lesson early in my flying career during my first solo altitude flight from my backyard helipad in California. I had just returned from Rotorway phase II flight training where I received a total of 7 hours of altitude training and 3 autorotation entries (the RWI flight instructor did the flare and recoveries as per their policy). I had my solo-flight-to-altitude endorsement from the Factory school so why did I feel so ill-prepared to launch my pride and joy, my life long dream, my MAJOR financial investment, into the air for the first time above the 2 foot AGL hover height that had been it's domain since it's FAA Airworthiness Inspection 3 months prior? Perhaps it was the realization that I did not have enough flight experience in helicopters, and no altitude training in my own helicopter. Just one mistake, one error in judgment, and all of my hard work building the helicopter could be lost. This is all too often the case when a student pilot with insufficient training becomes the initial test pilot of a helicopter that has never been flown either in hover or taken to altitude. For three days straight I would preflight the helicopter, bring it into a hover and then chicken out. I would end up spending the entire flight session hovering and at the same time mentally beating myself up for not having the nerve to launch this untested helicopter into the pattern. After another near sleepless night I told myself that it was today or never. Once again I did a thorough preflight inspection, brought the little helicopter into a hover, and then slowly began to ease it forward.
After passing directly over the power lines and crossing the county road I was now climbing through 200' AGL and starting to relax. My wife Sheila was standing in the bed of our company dump truck with the video camera recording this momentous event. Just as I was starting to feel like I was doing pretty well with this altitude flying, out of the corner of my eye I noticed that the passenger side rear seat cushion (the early Execs had separate back and seat pads) detached from the Velcro attachments and fell face down onto the bottom cushion. With that thought in mind I knew that I had to grab that seat cushion before it blew out the doorway, but how to do that? Obviously both of my hands were fully occupied. I tried to quickly let go of the cyclic with my right hand to snatch the cushion but that didn't work. My experience level was so low that I could not take my hand off the cyclic and grab it with my left hand due to the death grip that held it there. As I was trying to figure out the proper course of action, the seat cushion began to vibrate toward the open doorway. Panic filled my mind and I knew that unless I did something, and it had better be the right thing, I was about to die. I forced myself to momentarily let go of the cyclic with my right hand and grabbed it with my left and just as I was reaching for the cushion, a gust of wind took it out the doorway. I snatched the cyclic back and braced for the inevitable lawn dart scenario. Nothing happened! For some reason the cushion missed the tail rotor and I was still flying, sort of. Now to find the cushion. It had fallen out over a large 800 acre pasture so I circled and looked for it. From 200 feet up I could not locate the cushion in the tall grass. I definitely did not feel at home up there at 200 feet circling and looking at the ground so I descended and brought the helicopter into a hover, now that was more like it, I could do that! I hovered around the pasture for several minutes and finally found the wayward seat back cushion. After landing, retrieving the cushion, and this time securing it properly under my own seat cushion, I lifted off to head back to the hanger. The next challenge, how to bring the helicopter into the narrow piece of property that I had never approached before. Let's see, I had been told to always approach into the wind. The wind was blowing across the narrowest dimension of the property from the south. Funny, it had not seemed narrow at all when I was hovering those 20 hours all over every square inch of it. Now it looked like a strip of Christmas ribbon. I began my approach at 65 mph as I has been taught during my factory training and always landing on a long airport with plenty of room to slow down. Next I passed over the other set of power lines (directly over the pole, of course) and began my descent. Unfortunately there was no where near enough room to bring the helicopter to a hover much less slow it down to ETL before I got to the neighbors house.(Of course I can do it now but with my 7 hours of forward flight training, my skill level just was not there yet) Stretch had told me that the approach was to be made at 65mph and then slowly decrease the airspeed over the RUNWAY as the altitude was decreased. In the 7 hours at Rotorway Phase II training, we had never performed an approach to any landing that was not over the very long runway of Chandler airport. Also, I had never been taught how to do a Quick Stop to rapidly decrease the forward speed of the helicopter. The second lesson that I learned was that I needed more flight training before I launched into the skies again. I promptly hired a Rotorway-Experienced flight instructor by the name of Jim Sagerser to come to my location and we worked on approaches, departures, quick stops, and autorotations, straight-in, 90 degree, and 180 degree autos until I could do them proficiently every time. Now here it is nearly 20 years later and I find myself doing the same thing, providing flight instruction to a student who realizes that he is not prepared to test fly his new helicopter. As I write this article I am on an American Airlines flight to California to dynamically balance, test fly, and then instruct a student who rolled his helicopter after 3 years of intensive construction work followed by 10 hours of Phase I factory training. He had no prior helicopter flight training until he attended the factory school. After 10 hours of factory flight training he received his solo-to-hover endorsement. He returned home to his brand new helicopter. He was now a TEST PILOT on a never-before-flown helicopter, a recipe for disaster.
Once the fire was out, the only thing salvageable was the transponder antenna. Over the last three years he built a new Exec 162 around that original transponder antenna and now I am going to first inspect his helicopter, then help him with the rigging and balancing of the rotor system and controls, then test fly it for him, and finally provide him with the flight instruction that he needs. This time he wants to know how to fly this second Rotorway that he built with 100% certainty that he can control it before he once again tries solo flight. Let=s summarize this unfortunate chain of events: ( Tony now has several years and many fun-filled hours flying his Rotorway around the northern California area). Another service that I now include in my flight training is proper rigging and dynamic balancing of the main and tail rotor systems prior to flight training. Since I began offering dynamic balancing and then test flying each helicopter before we begin flight training, that training has been so much more enjoyable with a properly rigged and smooth-running ship. Here is a list of definite Do=s to remember regarding your newly built and inspected experimental helicopter. 1. Do get proper training prior to flying your newly built helicopter including many autorotations. These should include straight in, 90 degree, and 180 autos so that the helicopter can be turned into the wind for landing should a power or drive train failure occur. 2. Do make sure that your helicopter is properly dynamically balanced prior to flying it. An out of balance main or tail rotor system will cause not only unwanted vibrations in the cockpit, but also will accelerate the wear on the components of those systems. The replacement parts are expensive where the dynamic balancing of those systems is very cost effective. 3. Insure that you have secured everything in the cabin prior to flight. Brief you passenger regarding loose items. Anything in the pockets or on the belt that could possibly either exit out the door or jam a flight control. A cell phone, wallet, sweater, knee board, sectional chart, manual, etc could blow out that open door and take out your helicopter and your life. A wallet can jam the collective lever. A cell phone or camera can fall below the collective preventing full down movement should the need arise to drop the collective for a descent or autorotation. Dan Van Duesen nearly lost his beloved Taz (Exec Extraordinary) when he lifted off with a cameraman from the factory during the RWI Grand opening. The camera which hung by a strap from the neck of the cameraman slipped down behind the cyclic and when the cyclic was eased forward and the helicopter began moving, the camera slipped down even further and prevented any aft cyclic movement. We watched as Dan's helicopter raced toward the parked airplanes and finally slid to a stop as Dan used his skill to do a run-on landing, a dicey maneuver in a Rotorway helicopter without the extended skids and skid shoes. Orv Neisingh |
|