 |
ARTICLES |
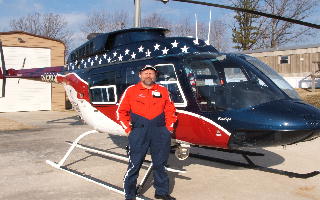
My
First Rotorway |
|
Back in the early 90s most of us had never even heard of the Internet. Those of us that were building and flying RotorWay helicopters were pretty much on our own unless we belonged to some sort of club or group of RotorWay enthusiasts. Instead of just firing up the computer and checking the web sites and forums to research what other builders are doing to their helicopters and the results, we made lots of phone calls. Like today, some of the information that we had acquired in talking with other builders was good and well thought out but some was not so good and in some circumstances, it was downright dangerous. The purpose of this article is to share some of my own personal learning experiences to inspire the reader to be a safer RotorWay builder/pilot. It is also my hope that the reader will carefully consider any modification that they intend to make to their helicopters and to consider the potential consequences that may result from those changes. Many times we only hear about the positive experiences from builders but I feel that it is very beneficial to learn from our mistakes. If we candidly share those experiences with others at the possible risk of looking foolish, someone just might avoid a catastrophe from out experiences. I have learned a lot from my own experiences hope that you are able to learn from then also. When I first purchased my 1985 RotorWay Exec in 1991 I had visions of flying every day on new adventures with my wife at my side. I was planning on finishing the few items left to be completed, acquire my N-number, get it inspected, and then start flying. It didnt happen quite as expeditiously as I had planned. See photos of my exec under "Cool Rotorway Stuff " button on the home page The kit was mostly assembled when I purchased it. On closer inspection, once I had it home, I discovered that many of the welds on the frame had hairline cracks along the joints. I decided to completely tear the helicopter down. Upon the advice of Tom Smith at the factory, I sandblasted the frame and then gas welded every welded joint on the helicopter, making sure that each joint cooled slowly. In the early days the builder received his frame tack welded and it was up to the builder to complete the welding. The person that I purchased the helicopter from had apparently used a wire feed welder to complete the frame without allowing the joint to anneal properly. In time this showed up as cracks in the welds. If you are buying a ship that someone else has assembled and or modified, it is wise to do a very intensive evaluation of the work that they completed prior to your purchase. In my case, I was so excited about finally purchasing my own helicopter that I did not take the time to research which potential trouble areas to look for. Today we have such a wide range of experience with RotorWay helicopters that we can avoid many of the mistakes that some of us made early on. As the assembly of the kit progressed I moved the engine from its stand and laid it on its side. In short order I noticed a few drops of oil under the upper drive shaft seal. It turns out that if the engine sits for an extended period of time without being run the seals can dry out and leak. This engine had sat for six or seven years since manufacture. It was just a coincidence that I had laid the engine on its side allowing some oil to leak out. Fortunately there was enough oil in the case to leak out of the seal for me to find. Had I just reinstalled the engine vertically as I had removed it without finding the bad seal I would have completed the helicopter and found that I had an oil leak coming from below the main engine drive pulley. Just a note, replacing that top seal is a bear but if your engine has been just sitting for years prior to your firing it up, it may deserve confirming the seals integrity. Once the helicopter was assembled and running and I had completed
phase II at the factory I was ready to fly. I had hovered for
at least 40 hours testing the helicopter and improving my skills
prior to taking the helicopter higher than 5 feet AGL. My 6th
take-off from my home landing pad could have been my last. I performed
my normal take-off and at approximately 50 AGL I was engulfed
in a cloud of gasoline vapor inside the cockpit. Immediately I
had visions of my wife (who was filming my departure) watching
my demise with the helicopter exploding in a fireball and knew
that I was a dead man. At that point caution went out the open
doorway and I made one of the most dramatic maneuvers that I had
ever made, much like a wing over agricultural pedal turn, flair,
dump collective, and bail out, all within a few seconds. As I
exited the helicopter I killed all electrical power, closed the
fuel shut-off, and then ran for cover. For some reason the ignition
did not ignite the fuel vapors so I am here to tell you about
it. When the rotors stopped we approached the helicopter we noticed
a large puddle of gasoline spreading across the concrete. Subsequent
investigation showed that the fuel pump O ring that had also
sat around those six or seven years had become hard and suddenly
let loose allowing pressurized fuel to spray into the engine compartment.
No one in our helicopter club or at RotorWay had ever heard of
this happening and were all a bit taken back when they saw the
deteriorated O ring at our next Sierra Rotorcraft Club meeting.
After I had installed all brand new belts, hoses, fuel and oil lines, fuel pumps, and every seal that I could locate I began to fly every chance I got. Shortly after putting my helicopter back together and resuming flying, RotorWay sent out a advisory notice to all Exec owners. It stated that the Exec was not safe to fly with the 1.5 main rotor shaft and it should be upgraded to the 1.75 shaft used on the Exec 90. I immediately removed my main rotor system and sent it in for upgrade. Safety first was my new motto. Once the new 1.75 rotor shaft was installed I was ready to fly. I had put around 30 hours on the new rotor shaft when RotorWay sent out a notice that everyone should upgrade to the dual ignition system of the Exec 90. Again, safety first so I sent in my old heads and installed the new ones with dual electronic ignition. My helicopter was growing up to be an Exec 90. .I had upgraded the frame per RotorWay and even installed the Exec 90 new-and-improved water jackets. I had designed and built the first electric clutch that allowed me to start the engine without the blades moving. (That was very popular and I sent out around 20 sets of plans so that others could do the same mod to their ships). Another mod that I made was to install aircraft landing and taxi lights in the bottom of the tub. These were attached to a door cut into the tub bottom. With a cyclic switch I could turn the lights on and with another switch on the cyclic that controlled an actuator I could lower the door and lights to aim the beam anywhere from straight ahead to directly under the helicopter. This helped greatly for night approaches to a spot landing. To this point all of my modifications were working out very well on the helicopter and I was quite pleased with my work. The Execs had an opening in the front of the doghouse that was not present on the Exec 90. I nearly had an Exec 90 now with the exception of the Exec doghouse and the landing gear. I decided that the hole in the front of my Execs doghouse was not accomplishing anything so in my quest to convert my Exec into an almost Exec 90 I decided to block off the opening. Up to this point every modification that I had made to my Exec had been an improvement in safety and function. If the Exec 90s didnt need the big hole on their dog house, why did I? After blocking off the hole and glassing it in, my helicopter was looking more and more grown up. I did a bit of cool-weather flying to see if the new and improved dog-house changed any of the temps, and all was good. My wife and I were invited to join three Sierra Rotorcraft Club members at Clear Lake, Ca. for lunch. We decided to fly our Exec the 60 miles over the mountainous terrain. I had faith in my helicopter, after all I had made it better and safer with all of the modifications that I had installed. Saturday morning turned out to be beautiful and clear as we departed our home helipad and headed for Clear Lake. The Terrain was high so we climbed up to around 5500 ft. I was thoroughly enjoying the flight when my wife began complaining that she was getting burned on her left thigh. I told her that it would be all right and she informed me that it would not! She also informed me that if I didnt get her on the ground NOW she would take us down herself. It turned out that with the front hole in the doghouse blocked off the air flow throughout the engine compartment and body was altered and now extremely hot air from the engine compartment/exhaust pipes was entering the cockpit from the center collective slot. This hot air was actually inflicting a second-degree burn on my flying companions left thigh. I had tested the new modified dog-house for several hours of flight prior to this trip. The check out had been with me flying solo and when all engine temps were good and flight characteristics were normal I assumed that the mod was good to go with. I had to find a place to land and do it NOW. We were at 5,500 and the nearest open area was a large flat pasture on the top a mountain nearly below us. I did an auto-rotation to the field to get down quickly and came to a 2 foot hover. The surface was dried grass with cracked dried earth showing , it looked solid so I set down. As I lowered collective the helicopter began to lean to the left and mud began to cover the skid on my side. It turned out that what we landed on was the bottom of a very large empty pond that had mud only inches below the crusted surface and no water showing. The dried grass on the surface fooled me into assuming that the surface was hard and solid. This relatively low time pilot was in a predicament. My wife wanted out, I could not lower collective further without rolling over, and every time I raised the collective the right skid would rise but the left one was stuck solidly in the mud. This is a classic recipe for dynamic rollover to occur. I had hired a RotorWay-experienced flight instructor for a week of additional flight training between my Rotorway phase one and phase two. He had told me that if I ever find my self in a situation where I have one skid stuck, I needed to maintain enough collective pitch to keep from settling further. At the same time I should gently apply alternating anti-torque pedal pressure to slowly wiggle the nose of the helicopter right-left-right as collective pitch is very carefully increased. This training immediately came back to me. As I did what I was taught the left skid slowly broke free of the mud and we were able to hover taxi to the edge of the field where we were able to set down on a solid surface. Sheila had second degree burns on the outside of her left thigh and was not too happy. Here we were on top of a mountain at the edge of a bog and no civilization around. I did not feel like walking out so I improvised. I always fly with my Leatherman tool on my belt so I opened it and with the saw blade I removed the fiberglass plug that I had so beautifully fitted over the un-needed hole in the front of the dog house. That accomplished, we lifted off and there was no longer the hot air entering through the center collective slot. When we arrived at Lampson Field, Len Chrysler and Nathan and Elaine Fronsman were waiting for us. They were amused by the grass that was still dangling from the skids and helped us clean the helicopter to make it presentable. With a bit help from their first aid kit Sheila was feeling better and we had a great visit and an uneventful return flight home. I learned that sometimes a seemingly good idea is not so good when put to the test under all conditions. If I had hover tested the doghouse modification with a passenger in the helicopter I most likely would have found the hot air problem prior to barbecuing my wifes leg. One other modification that I made to my RotorWay was before anyone was installing cog belt drives. Like other RotorWay pilots I was plagued with oil from the chain drive getting on everything inside of the engine compartment. In retrospect the amount of oil was not really that much but I wanted to have everything squeaky clean inside the cowl. Most of us just did a good wipe-down during the post flight inspection and that seemed to work well. One of our club members reported that he had come up with the ultimate solution to the oil bath problem. He had removed the oil bath completely and used a motorcycle chain lube that he sprayed onto the chain. He reported that he applied it every 5 flight hours and that he was running very low chain temps. The only downside reported was that there was a small band of lube that was flung off the chain onto the inside of the fiberglass of the engine compartment. This was easily cleaned and no oily residue was being deposited on the belts or exhaust wraps. After he reported putting 50 trouble-free hours on this bath-less set up I decided that I would try it too. Big mistake! I had not really seen any evidence that his flight hours were actual but took his word for it. I removed my oil bath, cleaned the chain of the old oil, and applied the chain lube as per his directions. I decided to hover at least 10 hours checking this modification frequently to verify its integrity. During the first 30 minutes of test flight everything appeared normal. I landed the helicopter and checked the chain. In only 30 minutes the chain was so hot it was smoking. The aluminum main rotor shaft drive sprocket had shed aluminum from the face of the teeth and two rollers were missing from the chain. This is one point in my Rotorway experience where I felt like a fool! I acted on the verbal testimony of another builder and found that my experience was vastly different from his. Several thousand dollars later I was flying with a new chain, two new sprockets, and new oil in the re-installed chain bath. The one thing that I did right was to test this modification very close to the ground in a hover. The only consolation was that my chain had around 80 hours on it and was due to be replaced at 100 hours. Just because someone tells you that a modification from the factory kit works well, dont blindly go along with all that you are told. I know of many RotorWay helicopters that are flying virtually stock as they were supplied in the kit and they are flown with great success. As the builder you have the right to change and improve your helicopter. If you choose to make changes from the helicopter as designed, be sure that those changes are well thought out, well designed, and thoroughly tested. It is important to thoroughly test any modification to your helicopter before committing to flight at altitude. If something does not work quite as well as you thought it would, an immediate set down from a hover is preferable to finding an appropriate landing site and getting to it from altitude. Whenever you make a modification to your helicopter you are the test pilot, as such, test it. With proper maintenance, tested modifications (if desired), and thorough training you should be able to enjoy many hundreds of hours flying your kit-built helicopter. Life is good!! Fly safe and smart. Orv Neisingh |
|