Suggested Method for Widening The
Pilot Side Collective Pocket The following outlines the steps I
took to widen the pilot side collective pocket on my Rotorway 162F
helicopter. This modification was suggested to me by several Rotorway
instructors. The modification provides extra room for the pilot’s
hand in the collective pocket in the case he has to enter an emergency
autorotation. The factory molded collective pocket in the console
in many cases (depending on pilot’s hand size) does not provide
adequate clearance for your fingers and knuckles if you are holding
the collective and throttle grip in a normal manner that would be
used in a steady state flying condition.
- First the fiberglass console should be off of the airframe
and in a disassembled state.
- Place the console on a bench or table so that the work area
is of a comfortable height and position.
- Using masking tape mark the existing pocket with a centerline
down the collective pocket floor. The length of this line is more
of personal preference, but allow for enough room to accommodate
the collective handle and grip for the area to be widened.
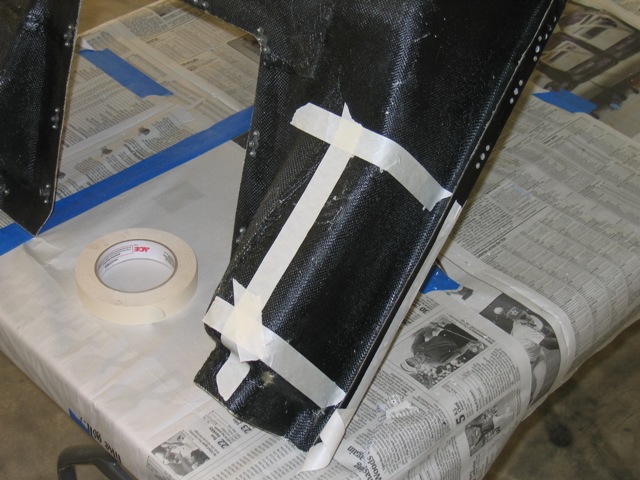
| Here
is the collective pocket marked on the back side
of the console. Inside of the masking tape lines
is where I made the cut using the Dremmel tool
with an abrasive disk. |
|
- Use a second piece of tape to mark the half point of the existing
outside shoulder of the console. This point may fall about ½
inch from the outside edge or wall that the tub attachment nut
plates are attached to
- Decide how much area, or total length of the existing collective
pocket that you want to widen.
- Using masking tape draw the side line lengths of tape from the
centerline in the collective pocket floor to the second mask line
on the console edge.
- Repeat the last step for the opposite side of the collective
pocket.
- You should now have a masked off box of an area within the
existing collective pocket.
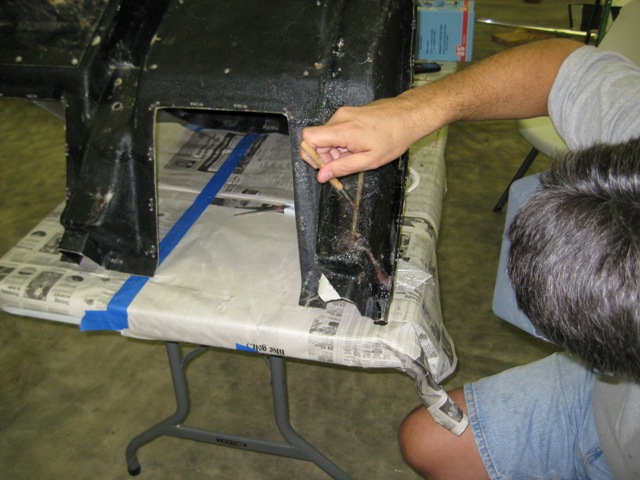
This
shows the corresponding marks on the inside of
the collective pocket. I drilled holes in the
corners of the masking lines on the back side
so that I could transfer the lines to the front
and make sure I was going to cut in the correct
places. |
|
- Using a 1/8 inch drill bit, drill holes in all four inside
corners of the masked off area.
- Use a Dremmel or similar tool with an abrasive disk to cut
along the inside edge of the masked area of the collective pocket,
taking care to cut only near the edge of the taped line. Please
note; take your time making these cuts as you will need this fiberglass
piece that you are cutting away from the console. Do not discard
it!
- Carefully remove the piece as a whole from the console after
the final line is cut.
- Turn the console up side down so that the bottom side is facing
up at you. With 150 grit paper, carefully sand the area of the
collective pocket and freshly cut edges of the console. When finished
sanding, adequately remove all dust from the surface.
|
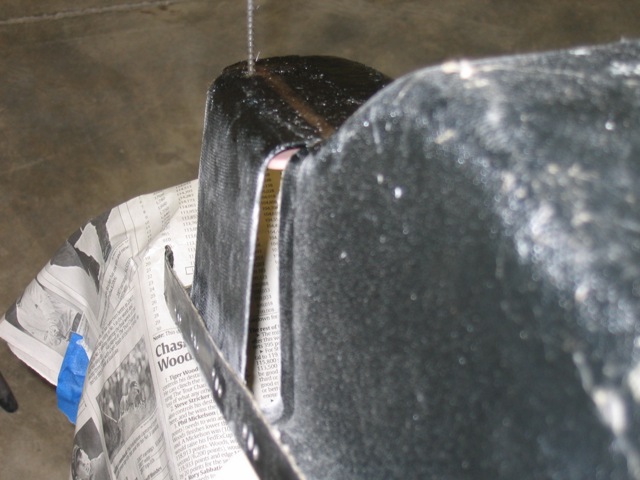
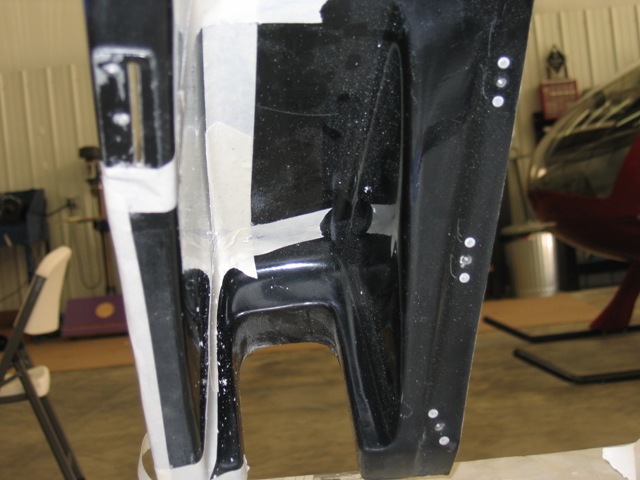
This
is side shot looking towards the back of the console.
See that gap, that will get glassed over and shows how
much more room I am gaining in the pocket.
|
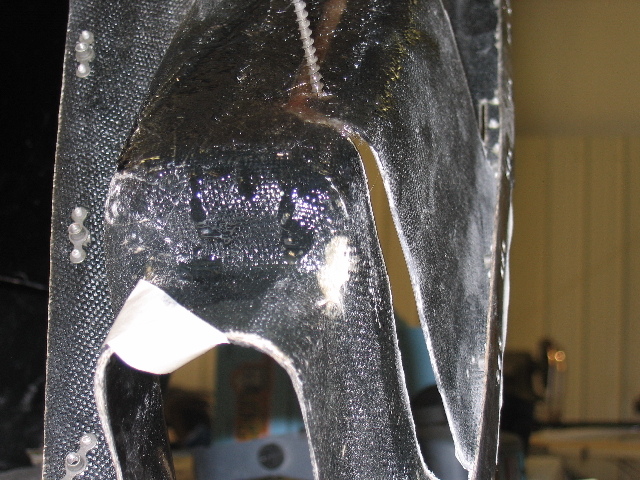
This
is side shot looking forward towards the front
of the console…..similar sized gap to the
one in front. |
|
- Turn the console right side up.
- Take the cut fiberglass piece (from here on referred to as
“the cut piece”) and place it in the existing hole
within the pocket. Place the outside edge of the cut piece under
the existing lip of the console. You should be able to fit the
edge of the cut piece between the existing nut plates (if have
installed them) and the inside edge of the console. Place a piece
of masking tape on this edge to hold the cut piece into position.
The masking tape will also act as a hinge point to allow you to
position the cut piece after you turn to console over (upside
down). The masking tape will go across the cut piece and the existing
console edge lip.
- After you have flipped the console over (upside down) you should
now be able to position the cut piece the proper distance desired
(air gap) between the existing pocket centerline and the cut piece
line. On my ship I had about a ½ inch gap that I would
have to span with new fiberglass lay up. Using masking apply two
temporary pieces to the bottom side of the cut piece and the existing
console edge to secure the cut piece the proper distance from
the collective pocket centerline.
- Turn the console right side up.
- You will now need to make some sort of mold bottom for the
collective pocket. I used an old paint stir stick covered in clear
packing tape. This works well, as fiberglass and resin will not
stick to it, yet it provides a flat surface to start laying glass
up to. Tape the mold bottom between the existing collective pocket
bottom and the cut piece taking care to make sure it overlaps
both pieces sufficiently
- Turn the console upside down. Cut fiberglass mat strips to
the proper length that you know will fill the valley or gap you
created between the existing console surface and the cut piece.
Using resin and catalyst mixed in proper proportions start painting
your mat strips with the resin mix in place to cover the gap.
I laid up three layers with the final layer overlapping both surfaces
(existing console and cut piece by about ½ inch of area
on each surface). Take care to firmly dab the material so that
all air bubbles are removed within the layers of the “laid
up” fiberglass. Let the piece cure or “kick”
before you start on the next area.
|
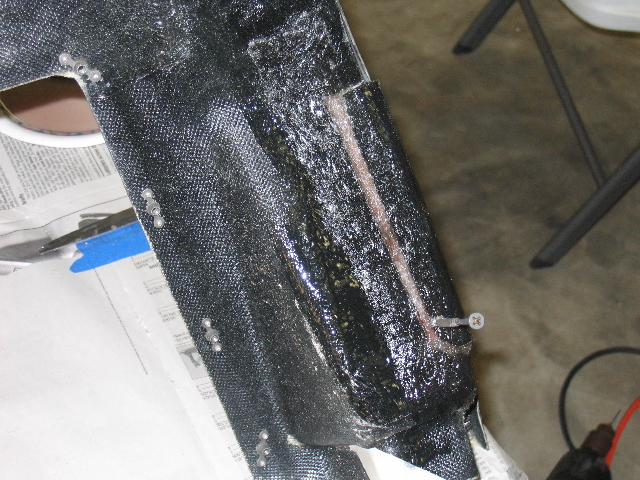
This
shows the first layer of fiberglass mat laid up to join
the cut piece to the console. If you look closely you
can see the lighter area which indicates how much I opened
the pocket up on the bottom. This will come in handy for
my big hands when the time comes to practice those autos. |
- Turning the console right side up, you can now remove the temporary
mold bottom (paint stick with packing tape attached) you made
in the bottom of the collective pocket. Do not discard this, you
will re-use it for the collective pocket sides.
- Tape the “stick to the side of collective pocket where
you have an angled gap. Try to fit the stick as close to the inside
of the pocket side as you can. Also place the stick so that it
is up against the cut edge of the pocket. Take additional packing
tape and cover any air gaps you have. Try to make this a leak
proof seal but don’t worry about the even placement of the
tape as you will be sanding this area later.
- Turn the console over once again with the bottom facing up.
- Start laying fiberglass strips across the side angled gap that
you have. You will be laying up fiberglass and resin material
over the angled gap against the temporary mold bottom (paint stick
with packing tape).
|