 |
HINTS AND TIPS The Buttons below will take you through the different hints and tips that I feel will make your helicopter safer and more reliable. |
WATER PUMP
- The water pump design on the Rotorway helicopters is unique and has been prone to leaking at the seal, especially if the water pump/alternator belt is run too tight.
- The water pump seal &gasket (PS-447V) US Seal- The V stands for Viton and is the recommended seal. A seal without the V will work but does not last very long.
- It is wise to have an extra water pump seal and water pump gasket on hand as they often leak during training and need replacement- having a spare on hand saves much down time.
- Have a tube of high temp flexible gasket seal handy.
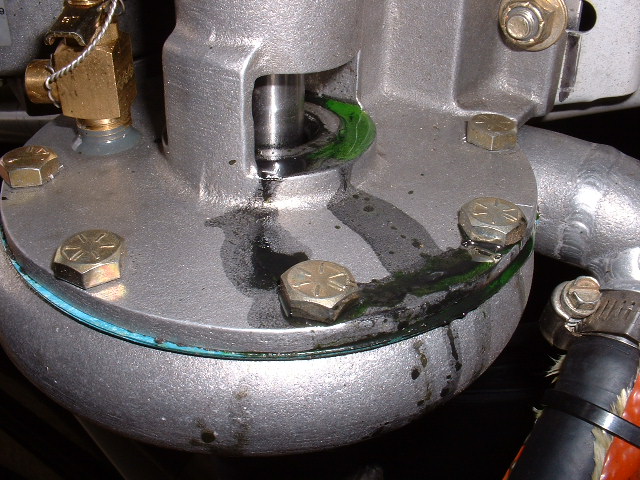
- Here is a photo of a typical sight following a training session where the water pump seal has let go. A fairly loose water pump belt (but not so loose that it will slip) will help prevent the seal from being damaged by the water pump shaft flexing at the seal.
- Antifreeze is flammable and does catch fire and burn.
- Antifreeze is very slippery and can and will cause your drive belts to slip leading to possible loss of the helicopter. Be careful when checking your surge tank anti-freeze level. The underside of the cap usually has antifreeze on it that will drip onto your belts when the cap is removed if you are not careful.
The following is how I replace the seal on the Rotorway water pump.
I do this without removing the pump.
- Drain the antifreeze down to a level below the water pump base. You can do this by tipping the helicopter back onto the stinger.
- Place a piece of hose over the pet cock opening with the other end into a clean pail
- Open the pet cock and drain all of the antifreeze that will come out by gravity. This should get the level down below the water pump.
- Remove the hose from the outlet (back side) of the water pump
- Remove the bolts from the upper half of the water pump
- Gently pry the water pump halves apart.
- Swing the lower half down and way from the upper half. I use a piece of strap or bungee to strap it to the forward frame member to keep it out of the way
- The impeller is screwed onto the shaft and unscrews in the direction of rotation. (clockwise looking down on it from the top)
- I take a block of wood and a hammer. I put the end of the wood against the impeller vane and give it a sharp rap in the direction of rotation
- This loosens the impeller and it easily unscrews.
- Remove the impeller and if the lower portion of the seal did not come out with it you will need to slide it down off the shaft.
- Notice the orientation of the lower seal so that you will orient the new one correctly.
- Clean the mating surfaces of the water pump halves.
- Note the distance that top of the old seal is from the top of the pump casting because this is where the new one will need to be when you install it.
- Take a punch or dull screw driver and from the top tap the upper portion of the seal downward (you can see it in the photo just inside the upper the casting around the shaft. It will slide down the shaft and fall out the bottom.
- Clean the seal area up inside the top casting.
- You do not want to touch either mating surface of the new seal with anything including your fingers, the lapped surface is very easily damaged.
- Remove the new upper seal from the package and place a thin film of high temp sealant around the upper outer circumference were it will be contacting the inner diameter of the upper casting.
- Find a 12 point socket of the proper diameter to allow the seal portion to fit inside the socket but the metal ring of the seal will not. The OD of the metal part of the seal cannot be larger than the OD of the socket because the socket needs to fit up into the casting hole. (Trial fit the socket into the seal cavity to insure that it will fit into the machined area.
- Place the seal portion into the socket and be sure that the sealing lapped surface does not touch anything.
- Now with the metal cap portion of the upper seal resting on the top of the socket, slide it onto the end of the shaft and then tap it into position (where the old one was- usually around a 64th" below the casting top)
- The upper seal is now installed.
- Clean the impeller and place a thin film or high temp sealant onto the flat area just around the threaded hole where the rubber portion of the new seal will rest.
- Careful not to touch the lapped surface of the new seal, rest the rubber side onto the film of sealant and centered on the threaded hole
- Very carefully line the ID of the lower seal onto the end of the shaft and slide up until the threads meet.
- Rotate the impeller in the direction opposite of rotation (from the top it is counter clock wise) until tight
- Give the impeller vane a solid rap with the wood block in place against the vane with a hammer
- Install your new gasket with high temp gasket seal. Use it sparingly or excess seal will get into your cooling system. The rear hole is under the rear casting and does not get a bolt so I just fill the hole with sealant (not to much)
- Slide the lower half into position
- One bolt at a time- place some sealant on the threads and then place into the hole in the top casting and thread into the lower casting
- Do this with all of the bolts then progressively tighten until all area tight and to the proper torque
- Let the sealant set.
- Re connect the rear pump outlet hose
- Refill the cooling system with coolant
- Burp the water pump (place the hose onto the pet cock and bleed the bubbles out)
- Start the helicopter and watch the water temp gauge. I bleed more bubbles out while watching the water temp gage.
- If the temp goes into the yellow, shut the engine down and bleed again.
- Once all of the air is out,
check for leaks and then you should be good to go.
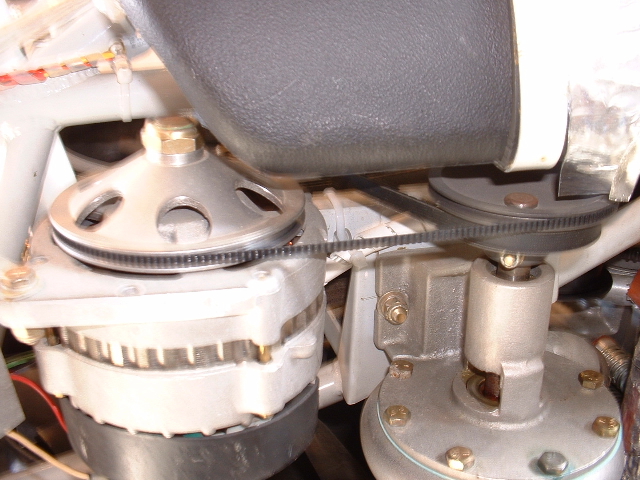 Referencing the photo above, The original alternator that Rotorway supplied had a small belt that drove it off of the water pump. The alternators now are higher amperage so they need to be driven by a larger belt as in the present kits. If the double pulley is mounted on the alternator with the alternator driven off the secondary and then the water pump driven off the alternator second pulley, the water pump belt tension can be looser while keeping the alternator belt tighter. This is not madatory and can be done yourselt. There is at least one after market supplier who is pushing this idea.
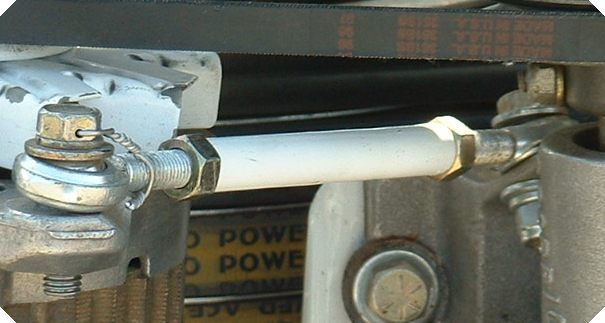
The kits alternator adjustment bracket is adequate but if improperly made can break. Here is a photo of one builder's modification to the bracket by installing a turnbuckle with both left and right hand threads. It is simple and easy to adjust.
The photo below was on a second hand ship that I was inspecting prior to flight instructing in it. The bracket had a weird bulge on it covered by black paint so I removed it and removed the body filler that was under the paint. When the previous owner had the strap break, he applied some bondo and safety wire, applied some black paint, and re-installed it. It would not have lasted an hour as both sides are broken as you can see. It is always good to have a ship inspected prior to purchase to find things like this. This bracket obviously was poorly made by the builder and it cracked along scratches that he left in the bracket when he made it.

Here is another issue that can get you into real trouble. I will let Dave tell you in his own words:
Dave Armando
Member Join Date: Jan 2007
Location: CT
Posts: 34
Rep Power: 9
Re: Longer skids
--------------------------------------------------------------------------------
Today I've joined the group that has had to auto in. I had coolant spray my tail rotor belts as I was hovering between 2 hangers.
After the second 360 I was able to set it down firmly with 1 skid in the grass and 1 on pavement.
I do have the longer skids with both reinforced. I kept it upright and there was pitching, but it happened so fast I can't say how far over I was, but all is well.
Mine are extended 18" and I made a mount in the same CG location as stock in relation to the mast which hasn't effected my range.
Thanks Orv,
Dave N13922 (still)
#24 21 Minutes Ago
Dave Armando
Member Join Date: Jan 2007
Location: CT
Posts: 34
Rep Power: 9
Re: Longer skids
--------------------------------------------------------------------------------
The thinking is a belt a little loose saves the pump seal. My ship never gets hot, always hits 72-73 thermo opens and instantly drops to 67 so I don't think a loose belt is problematic. Temps always in the green.
Yes I woul make sure the hose vents. I now have mine exiting at the engine pan so if it happens again the exiting water will be 3' prior to the tail boom and down washed by the fan away.
Dave N13922
P.S. I can't wait for Homers
|
| DISCLAIMER: The material on each page is the opinion of the author only and any actions taken by the reader relating to information on this site is the responsibility of the builder. |